Overview
Significant Features
Icons/buttons
Functions
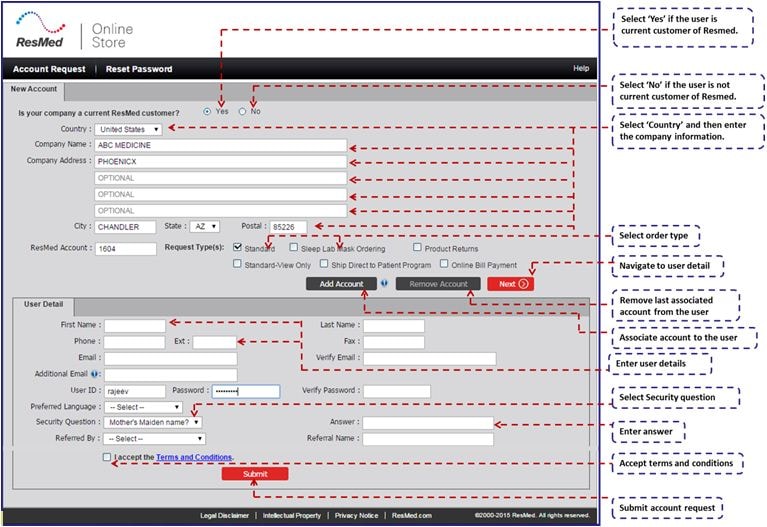
Account Request screen allows current Resmed customers to request a new user account. You can invoke the Account Request screen by clicking on the Account Request tab present on the top left portion of the login screen.
Top
Top
Account Request contains the following icons/buttons:

|
Associates account to the customer.
|

|
Removes the last associated account from the customer.
|

|
Expands view to enter new user information.
|

|
Submits the account request.
|
Top
| 1. | Select ‘No’ checkbox if the user is not a current customer of Resmed. The user will not be able to submit a new account request any further. |
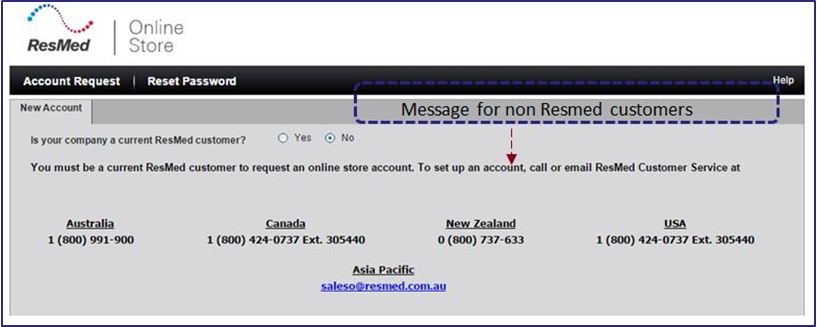
-
| 2. | Select ‘Yes’ checkbox if the user is a current customer of ResMed. |
| 3. | Enter Company Name. Place the cursor in the next enterable text box. |
| 4. | Enter Company Address. Place the cursor in the next enterable text box. |
| 5. | Enter City. Place the cursor in the next enterable text box. |
| 6. | Select State from the drop down list. Place the cursor in the next enterable text box. Tab over. |
| 7. | Enter Zip. Place the cursor in the next enterable text box. |
| 8. | Enter ResMed Account No. Place the cursor in the next enterable text box. |
| 9. | Left click on ‘Authorized Order Type’ check box to select the order type. Valid options are Standard-HME, Drop-ship, Sleep lab. |
| 10. | Left click on  button to associate account to the customer. button to associate account to the customer. |
| 11. | Left click on  button to remove the last associated account from the customer. button to remove the last associated account from the customer. |
| 12. | Left click on the  button to enter user information. button to enter user information. |
| 13. | Enter First Name. Place the cursor in the next enterable text box. |
| 14. | Enter Middle Initials. Place the cursor in the next enterable text box. |
| 15. | Enter Last Name. Place the cursor in the next enterable text box. |
| 16. | Enter Phone. Place the cursor in the next enterable text box. |
| 17. | Enter Extension. Place the cursor in the next enterable text box. |
| 18. | Enter Fax. Place the cursor in the next enterable text box. |
| 19. | Enter Email address. Place the cursor in the next enterable text box. |
| 20. | Enter Verify Email address. Place the cursor in the next enterable text box. |
| 21. | Enter User id. Place the cursor in the next enterable text box. |
| 22. | Enter Password. Place the cursor in the next enterable text box. |
| 23. | Enter Verify Password. Place the cursor in the next enterable text box. |
| 24. | Select the ‘Security Question’ from the drop down list. Place the cursor in the next enterable text box. Enter answer to the selected security question. |
| 25. | Left click on ‘Terms and Conditions’ check box to accept terms and conditions. |
| 26. | Left click on  button to complete the new account request. button to complete the new account request. |
Top


